Delivering the Beginner Experience – Alpine
Framing the Lesson
Goal of a Beginner Lesson
•The goal of PSIA-AASI is to provide an array of tools to allow the instructor to explore how to deliver a beginner lesson. By sharing your passion for the sport, creating a fun, safe, and exciting experience, you can turn students into lifelong skiers.
What is a Progression?

Lesson Expectations verses the Reality

The Teaching/Learning Cycle
•During this module, we will introduce you to the Teaching/Learning cycle. In the “Meeting Your Students” module later in the course, we will go into greater depth on how you as an instructor, will use this model to create a memorable beginner lesson.
•For simplicity’s sake, newer instructors can consider the Teaching/Learning Cycle as a series of steps. This approach creates an orderly flow to the lesson, reducing the decision-making process for newer instructors.
•Rob Sogard explains how the Teaching/Learning Cycle works, and how you can use it to create the best beginner experience.
Children’s Teaching/Learning Cycle

The Teaching/Learning Cycle Broken Down

Welcome & Introduction
•Be professional and greet each student, introduce yourself and have your students meet each other. During this stage you will begin to develop trust and build rapport.
•Don’t forget to invite your students to join the culture of skiing! Provide tips on terminology, the best way to carry equipment, and how to wear goggles helps to develop trust, and make your guests feel welcome into the broader snowsports experience.
Assess the Student
•Before you can build a lesson plan for the day, you need to assess your student’s physical abilities and technical understanding. Warm-up activities will give you an opportunity to see how comfortable your guests are on snow, while building good group rapport. Observe their movements, stance, balance, and agility.
Determine Goals & Plan Experiences
•Ask questions about their goals and motivations for taking a lesson.
•As the lesson progresses, remember to make sure the group goals align with what each student wants to learn and their motivations for taking a lesson.
Create Experiences for Learning
•Organize students and the lesson environment by choosing appropriate terrain based on ability and snow conditions. Interact with support, and encourage your students.
Guide Practice
•Guided practice is one of the most important parts of the teaching cycle.
•Create space to spend one-on-one time with each of your students while others practice or explore movements. Repetition of movements anchors the actual learning and sliding experience. Guided practice also lets you handle an ability split. Challenge your more advanced students with difficult tasks while you spend individualized time on guests who may be struggling. This also gives students independence while allowing you individualize the lesson.
Review & Preview
•At the end of the lesson, make sure to review the experience, preview the next lesson, and invite your students back to your school and the sport. The debrief is an opportunity for your students to discuss their progress and the goals they accomplished. This content should come from the student. It is your job to facilitate the debrief and make a link to what another day on snow would do for them.
The Learning Partnership
Introduction to Meeting Students
The Learning Partnership
Being able to connect, relate, and develop trust with your students has a big impact on the outcome of the lesson. Many factors shape the interaction between teachers and students. PSIA-AASI’s educational approach uses the student profile and the instructor profile to determine the individual characteristics each person brings to the learning environment. These characteristics influence how teachers read and respond to students; and how students respond in return. Together they form what PSIA-AASI calls the Learning Partnership. A collaborative relationship that involves a shared commitment to learning, active participation, mutual respect, and trust.
Working with Children
The Learning Partnership (Student Profile)
•This aspect of the Learning Partnership identifies the non-technical factors each student brings to the learning environment. Although these factors do not change skiing mechanics, they may influence the skill development and body movements that become a lesson’s focus.
•Here are the components of the student makeup:
•Personal characteristics and background
•Past experiences
•Attitudes and emotional states
•Learning styles and preferences
•Motivations and goals
•Identity, beliefs, and personal values
•Physical conditioning and health
•Expectations and understanding
•Social factors
The Learning Partnership (Instructor Profile)
•As there are characteristics that make each student unique, certain characteristics make each instructor unique. In the same way the student profile identifies the nature of your students’ attitudes and actions, your own personal background, values and beliefs, goals and motivations, physical conditioning, etc., contribute to your abilities and behaviors as a teacher. As a practice of self-awareness, you should be comfortable identifying these factors as they apply to you. In addition to these personal traits, you also bring a unique skillset as a teacher, leader, and facilitator. Your instructor profile influences your interactions with your students and defines your contribution to the Learning Partnership.
•Here are the components of the instructor profile:
•Sport-scientific knowledge and performance
•Teaching experience and understanding of learning theory
•Resort and snowsports school knowledge
•Preferred social style
Rental Shop
•As an instructor, it is key for you to be aware of the rental shop process so you understand what your students go through as they make their way through the shop. Understanding the fit of your students’ equipment is also key to a great lesson. Many people say the lesson starts in the rental shop, and some schools will actually have instructors meet their students in the shop so they can introduce equipment before moving to the learning area.
•Whether you spend time in the rental shop or meet your students on snow, it is so important to have a strong working relationship with the pros in the shop so that everyone can work together to make sure the guests are set up for success when it comes to their gear.
•Learning Objectives:
•Explain how the proper equipment and fit is vital to students having a fun and exciting experience in their lesson.
•Discuss the importance of having rental shop technicians exchange and alter equipment.
Properly Fitted Equipment
•Proper fitting equipment is essential to a good experience on snow. Remember the rental shop may be your students very first experience to our sport so it is essential that you check each of your students for the right gear, and that it all fits properly. It is better go back to the rental shop and get the proper gear than to try and make the wrong equipment work.
Skis and Ski Boots
Ski Poles and Helmet
Leaving the Adjustments to the Techs
•As your students leave the rental shop you will want to ensure they have their all equipment and it fits properly. Remember to adhere to your home mountain’s policy for adjusting gear.
Carrying Skis
•Things like showing your students how to carry their skis or helping them get their goggles on will help welcome them into the snowsports culture and make them feel like they are apart of our sport.
Meeting Your Students

Meeting Your Students

Communication
•When meeting your students for the first time, what you say is just as important as how you say it. We communicate both verbally and non-verbally. Interacting through body language can give your students perceptions about your mood, your level of alertness, your willingness to participate, and many more factors before you even speak a word. Body language includes posture, hand gestures, facial expressions, and eye contact. Typically, these actions complement the language of the speaker. Using body language can be purposeful to reinforce what’s being said, or it can be unconscious and unintentional.
Posture
•How people stand can reveal their attitudes. A relaxed stance can indicate a person is friendly, open to conversation, and willing to listen. Stand and face your students when first meeting them. If your students are young children, get down on either one or both knees to establish a friendly eye level with them.
Hand Gestures
•Hand gestures serve many purposes. Waving, offering a “thumbs up,” and raising hands to signal backing off are examples of symbolic gestures that represent common actions. Handshakes are formal and professional. High fives are informal and casual. Make certain that your hand gestures create a friendly and welcoming environment.
Facial Expressions and eye contact
• Facial expressions are clearly visible and immediately informative about people’s reactions. Making eye contact show’s you are interested and engaged. Smiling is easy and will make everyone’s day better! Raise your goggles and pull down your face masks or neck gaiters to let your students see your face, smile and sincerity.
•In summary, when you’re skilled at both verbal and nonverbal communication, you’re more likely to earn the trust of other people. They will tend to look toward you for expertise and approach you in conversation because they like you. Interactions base on strong interpersonal skills lead to meaningful relationships and will make teaching skiing much easier for you!
The first 5-10 minutes
•Sometimes all of your students will all arrive at the same exact time but, other times, your students will show up over the course of 5-10 minutes. Here are some tactics to start your lesson efficiently and engage your entire group.
•Find your own space – Gather all of your students assigned to you and find your own space away from the lesson meeting point and make sure your supervisor knows where to find your group.
•Group up – Circle up with your group making everyone feel welcome. Introduce yourself and have group get to know each other.
•Get on their level –If you’re working with adult students, “walk and talk” with them as you move to your group spot. If you’re working with young children, a game or challenge activity might be good for moving your group. No matter what, engage your students on their level
•Goggles up and face masks down – Make sure your students can see and hear you. Connect with them and let them see your face.
•Do an equipment check while introducing the gear – Equipment can set up and make a successful lesson. As you check equipment, you can make an informational game out of it, explaining how everything works. Check that boots are tied (buckled) tightly and emphasize this importance for better performance and ease of learning. Discuss clothing and wearing layers, explaining that it’s important to regulate temperature whether cold or hot. Your students comfort level is key to learning environment.
Finding Your Own Space
•Gather all of the students assigned to you and find your own space. Your space can be 5, 10, or maybe even 100 feet from where you first met. Make sure that the person(s) in charge of assigning lessons knows where you are and can easily see you. Finding your own space will create a natural point so your students can feel like everything is getting started. If you already have skis on and your students do not, make sure to take your skis off and walk with your students.
Group Up
•Circle up with your group so that everyone can feel like part of the group. Make sure that no one is left outside of the circle so that everyone feels like they belong to the group.
Get On Their Level
•If you’re working with adult students, “walk and talk” with them as you move to your group spot. If you’re working with young children, play a game or challenge activity as you move to your group spot. Once you get to your spot, it’s a great strategy to get down on either one or both of your knees so that you are on an even height with younger/shorter students.
Googles Up and Face Mask Down
•Make sure your students can see and hear you. Connect with them and let them see your face.
Do an Equipment Check
•This is a great time to check students’ equipment to make sure everything is set up for a successful lesson. As you check equipment, you can make an informational game of it. Explain the “why” behind equipment fit to all of your students so that they know what to check for the next time they come back. As you check if boots on, explain that boots that are on tightly will give them better control and precision when they start skiing. As you check that they are wearing layers, explain that they can let you know if they start to get too hot so that you can help them shed and store a layer.
Introduce Gear
•Start this process towards the end of the first 5-10 minutes so that any late additions to your group do not feel “in the dark”. Make sure that you are letting your students touch and play with their own gear during the introduction phase so that they feel actively involved in the learning.
Ensuring Your Student is Dressed for Success

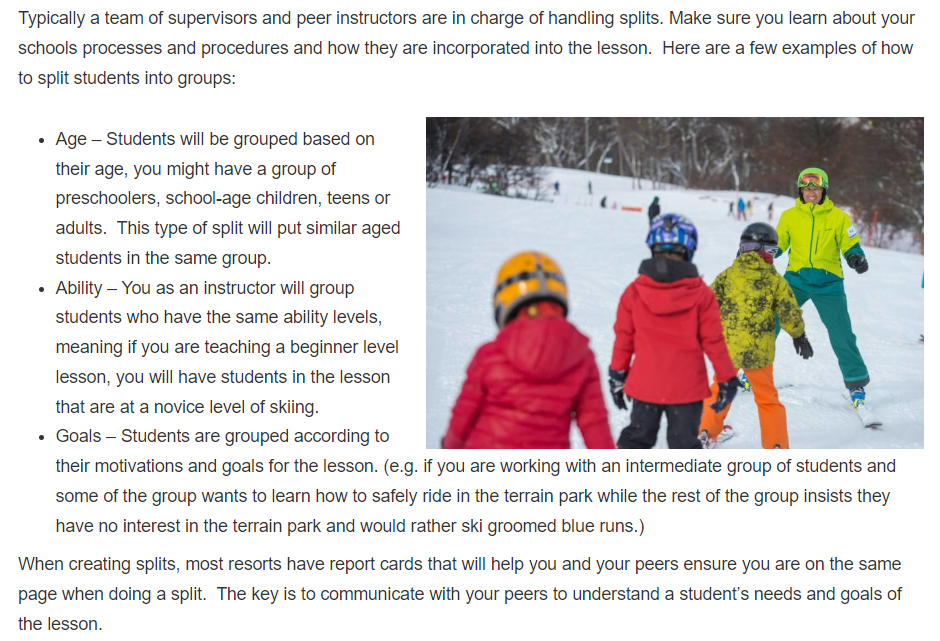
How To Handle A Group Split
•Now that you have learned about making a great first impression while starting to build rapport, we will walk you through how to handle a group split. As you have been getting to know your students you will begin to understand their needs and goals, and ability levels. While you are learning about their current abilities you can start to discuss other hobbies that your students enjoy and if they have ever experienced the sensation of sliding.
•Ideally, students should be in the correct group for their age, ability, desired outcome, and other factors that might affect their participation with other students. People at your resort that are in charge of assigning lessons will do their best to create appropriate groups, however, sometimes a student will slip through the cracks and end up in the wrong lesson. Most resorts have procedures for how to handle if a student ends up in the wrong group, but the ultimate responsibility for ensuring that students are paired with similar interests and abilities ultimately falls on the instructor. It is important to be sensitive in these instances, and remember that even though this guest may not remain you’re student, how you handle helping them get into the right group has an effect on their overall experience. It is equally important to remember this if a student joins you a few minutes late. It is not fun for a student to be tossed around from group to group, make sure to take an extra second to welcome them into the group and develop a connection.
Handling a Split
Verbal Split
•For many beginner lessons, just ask “How many of you have ever skied before?” Most will say never or it has been a few years. Asking questions, helps determine groups. Try asking “how many of you would consider yourselves very athletic?” or “how many of you would like to take a slower pace?” Asking questions like these can help to define groups of similar skill levels and goals. It is called a verbal split because we are only
Visual Split
•As you get to know your students, you will watch and assess your students movements, try creating a game to see how they move while you are waiting to start the lesson, who looks comfortable walking in ski boots, standing on one leg, and hopping from side to side? Start grouping people with similar movements (e.g. those comfortable walking in ski boots and those figuring it out).
Ability Split
•When using ability level to split your student’s into groups, you might ask them to do a movement assessment to make sure the groups fit together. Ski and Snowboard Schools will have unique assessment procedures based on your resort and the length of the lesson, terrain, volume of students, and other factors. The key to initial assessment is to help make sure the group can ski safely together and that no one in the group will either be either held back or pushed too hard.
Flatland Movements
Flatland Tactics
•In the videos below, you will see variations on activities that will help your students get started. Keep in mind that there are more variations that you can use that we do not discuss in this course. Begin to explore using your imagination to come up with your own variations that work for your students. When teaching kids, focus on the fun. Play games that help achieve the desired movements or outcomes. Through playing children can learn the appropriate skills they need.
Athletic Stance and Walking in Boots
•When you show your students how to stand in an athletic stance, and walk in ski boots, it provides them a foundation for preparing to ski. Watch the video below to learn how to get your students ready for their day.
Bowties and Boot Arcs
•These are great activities to do before your students put on their skis. Bowties and boot arcs allow them to feel how their feet and legs can turn separate from their upper body. In skiing, we refer to the upper body as the pelvis and up. These activities introduce them to the rotational control movements they will use for efficient skiing. Sometimes these exercises might be something you skip depending on the ability and personality of your guests. Remember you can always revisit stationary activities like these when your students are struggling to make a turn and need more awareness of rotational control.
Putting on Skis and Getting Up After A Fall
•Often times, we as instructors, forget about some of the everyday things we do like getting up after a fall or putting on skis. Here are two videos to walk you through some basic skills that we want to make sure we teach students how to do so they feel confident throughout the Learning Cycle
Introduction to Sliding
•Listen as Jeb Boyd PSIA-AASI National Teams Manager and Kevin Jordan discus the importance of getting your students moving.
One Ski Drills
•One ski activities are helpful to introduce sliding and gliding to students who may have never felt the sensation. The comfort level of your student and their confidence will determine how long you should spend on one ski activities. Sometimes you might get a hockey player or ice skater that does not need to spend time on one ski activities, while other times, you will have a student who has never even walked on snow, let alone felt the sensation of sliding. The amount of time you spend on each activity or exercise throughout the beginner/novice zone will be largely based on the needs of your student.
Getting Them Moving
•Now that you have taught your students how to get their skis on, and a few drills they can do with one ski, we can move to getting them comfortable with two skis. Next, we will discuss several movements to get your students sliding and gliding.
Two Ski Activities
•In order to slide down the hill, we have to get the student comfortable walking around, climbing up a hill, and, most importantly, maneuvering around on a slope. In this video, we will give you a few tactics that will help you guide your student. Remember these exercises are key, as they start to improve your student’s ability to get around on snow. First, we discuss the wagon wheel which is a great way to introduce adults to moving around with longer feet (i.e. skis on). With children, you will most likely create games that fit their age level and personalities. The video below will give you basic idea of how to get students introduced to having skis on and maneuvering around without getting tangled up.
Maneuvering on a Slope
•In this video, we will give you some tips to help you guide your student while on the slopes. Remember these types of tips are critical to getting your students moving and feeling more comfortable on the hill.
Straight Run
•A straight run puts the athletic stance into motion. Getting your students comfortable sliding down the slope is the first step to getting them skiing.
Gliding Wedge
•Now we want to emphasize the inward turning of the legs (with the skis slightly edged), this helps develop an awareness of braking with the skis to control speed. Adjusting the size of the wedge familiarizes students with the sliding action of the edged skis over the snow.
Turning Tactics
•As you have progressed through various turning techniques and your students are getting more comfortable with speed and turning, now is the time to blend the turning of their feet and legs while pressuring the outside ski. If they have confidence in their athletic stance while sliding, these should be easy steps to introduce. In the video below, Kevin introduces three different ways to introduce the first turn to skiers at different ability levels.
Using the Wedge for Skill Development
•The wedge turn is a great way for students to develop all skills, at comfortable speeds while focusing primarily on turning. It provides them with a solid base of support as they work to develop balance forward and backward along the lengths of their skis and laterally from foot to foot or ski to ski. For turns at this stage, it is important to emphasize a small wedge that keeps the skis flatter and easier to turn. Emphasizing turning, steering and guiding the feet and legs will develop the rotational control skills necessary as they work toward parallel skiing in the future. As your students turn across the slope, they will naturally feel pressure being directed to the outside ski. Have them embrace this sensation and celebrate this other important skill as they develop!
Linking Wedge Turns
•Now that you have taught your students how to turn, you can start linking them!
Parallel Turns
•Mileage is now your friend as you are moving to parallel skiing. Often times, you will find students have the ability to naturally start parallel skiing through mileage while adding speed to their turns. Remember to play a lot of games with students while you are in this phase of the lesson, changing up their turn shape and using stepping drills will allow them to naturally move to a more parallel turn.
Riding Lifts
•It is your responsibility to adhere to your resort’s lift policies, in the two videos below we will provide you with a few guidelines to help you along the way. Teach your students how to safely load, unload, and ride a lift. You should never assume they know how to load, but instead walk them through the process.
Wrap Up and Closing
•“Today could be someone’s first day of their vacation.”
• – Mark Wilkinson
•This is the last module for “Delivering the Beginner Experience” take a look at the following pages to get more information on establishing a plan for practice and additional resources to help you along your journey as an instructor.
•
•Learning Objectives:
•Establish the additional materials offered by PSIA-AASI to continue your professional development.
•Articulate the various ways in which you can inspire your students to return.
Review The Experience
•An important part of the lesson is to recap their learning experience. Reviewing the sights, sounds, and sensations of the day can reconnect students with the emotions from a great run or a lesson learned. Clarifying any last-minute questions or concerns helps students feel confident in their ability to ski or ride on their own without “losing” what they’ve gained.
Preview the Next Experience

For Children:
•A good way to remind children in your lesson on how far they’ve progressed, is to ask them very open ended questions and have them both tell you the answers and show you the answers. Examples include:
1.“How do we stop?” – Have your students show you the moves needed to stop while also describing what they’re doing. This will help them create cause and effect connections.
2.“How do we start our J turns?” – Have your students show you the moves needed to stop while also describing what they’re doing. This will help them create cause and effect connections.
•Once you meet up with your students parent/guardian, have your students show and explain the “answers” to these questions to them. You can be the translator so that the parent/guardian have some understanding of what to continue to reinforce with your students if they are out on the mountain together. Explain to the parent/guardian good terrain options for continued practice. This is a crucial step for not ruining the progress your students made during the lesson, as skiing terrain that is too challenging can cause regression in their skiing.
•For additional information on how to review and preview the lesson click on the buttons below.
Review the Lesson
•Have students review their performance. It’s an all too common practice for teachers to recap lessons for their students. A much more effective tactic is for teachers to engage students in a discussion about their experience and their day. Have them reflect on a success they had that highlights what they have learned. For example, “Remember how well you controlled your speed on that steeper run? What did you do differently?”
Review Goals and Progress
•Review the goal-setting process. Have your students recall their big-picture goal as well as any mini-goals or objectives you agreed upon to help them reach their goal. How far did they get? What were their successes and struggles? Make sure you encourage students to revisit their goals and appreciate how their performance has changed, and describe any new sensations or outcomes.
Make a Plan for Practice
•Agree on a plan for independent practice: How repeatable or consistent is your student’s performance? The answer to this question will help you prepare your students to continue to learn after the lesson. Perhaps they’ve only had a few successful turns, or maybe they’re consistently performing at a new level. They may even be beginning to transfer new skills to other outcomes, terrain, or snow conditions. Help your students choose appropriate terrain and tactics to practice their skiing for continued learning until you meet again.
Build Upon New Learning
•The amazing thing about learning is that it builds upon itself. Each change in understanding or performance creates a new perspective and opens new possibilities. Re-assess potential and performance. Revisit goals and plan new adventure.
Invite Them Back
•An invitation to take another lesson is a polite way to wrap up the learning experience. More important, it’s an invitation to continue the Learning Partnership, and work together to solve new challenges along the way to becoming better skiers.